Bike Fit
Where to Start
Bike Fit
If you like cycling and you are on Facebook, there is no doubt you will have seen posts about bike fit or people asking for help with injuries.
It’s not that it can’t work; it’s just if you ask a massive group, you get so many opinions it’s hard to know what advice is good and what is bad.
The Truth
The truth is that there’s no one magic bullet. Bike fitting, like being a physio, is a process. A good bike fitter will not just fixate on the ‘knee pain’ or ‘foot pain’; they will see you and assess you as a whole and use a methodical process to resolve your issues.
This isn’t a simple thing, and even live, it can take a good few hours and even multiple visits with some trial and error before you get to the bottom of some issues.
So, Where Would I Start?
Having spoken to many other bike fitters, I know there is no one way to bike fit. Some start at the feet, but most start at the pelvis.
For me, the bike fit starts at the pelvis. This is a change from my physio assessment, where a functional assessment would start at the foot.
There are lots of reasons to choose either the foot or the pelvis. For other activities (walking, running or running-based sports), starting at the foot would be my choice. For a cycling-specific assessment, however, it makes more sense to me to start at the pelvis.
The pelvis is very much the centre of cycling function. Unlike most movements where the main contact points are between the foot and the floor, the pelvis is also a contact point and a very strong one at that.
The reason for going to the pelvis first is that if, for example, the seat height is way off…then no matter what you do to the feet, a good fit is unlikely.
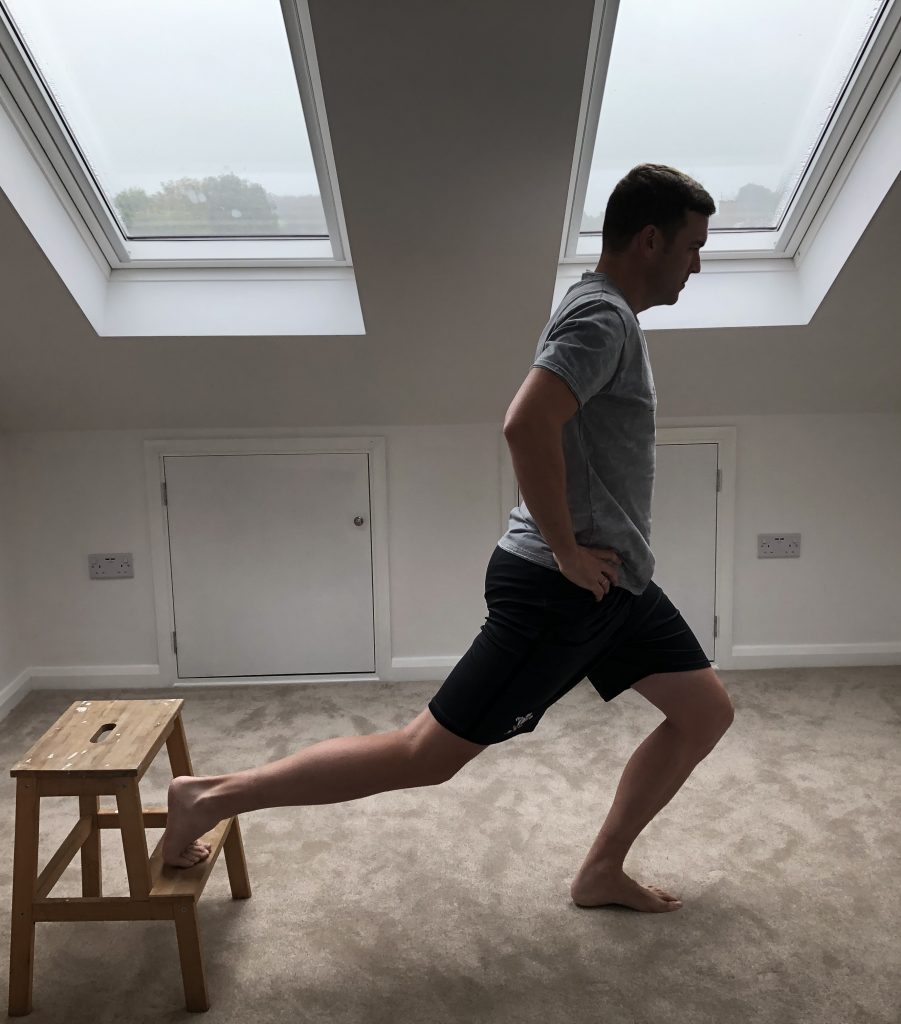
Off Bike Assessment
Even before you look at someone on the bike, you need to have a look at them off the bike. Being a physio, this comes pretty naturally. It really starts before they even think it started!
It’s always been a good source of information to watch someone move when they don’t think they are being assessed. Once they think they are being assessed, they’ll move differently…so take the opportunity to watch them walk in, climb stairs, take off shoes/socks, whatever it might be…there’s a whole lot of information in there for you.
The pattern isn’t set in stone, but roughly I’ll assess:
- Pelvis
- Hips
- Feet
- Thoracic
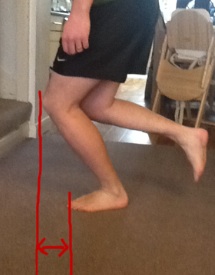
There are lots of different movement options to assess these and getting hands-on and feeling the quality of movement through the hips, for example, is a great way to learn more about the rider.
Talk to the Rider
Though I will have talked to them before about their cycling history, injury history and their goals, the off-bike assessment is a great chance to talk with the rider and go through some of that again. There are often more details to be gathered.
There’s always an injury they forgot to mention or a new goal they just set their heart on…whatever it is, keep asking questions and listen closely 🙂
Before you get them on the bike, make sure the baseline measurements are all taken down, and you know where you are starting. It usually makes for interesting comparison later on because I don’t measure as I go. I adjust by eye, on feel and by rider feedback, so things can be moved back and fore a few times, so it’s nice to see where you came from once you’ve found the best position for them.
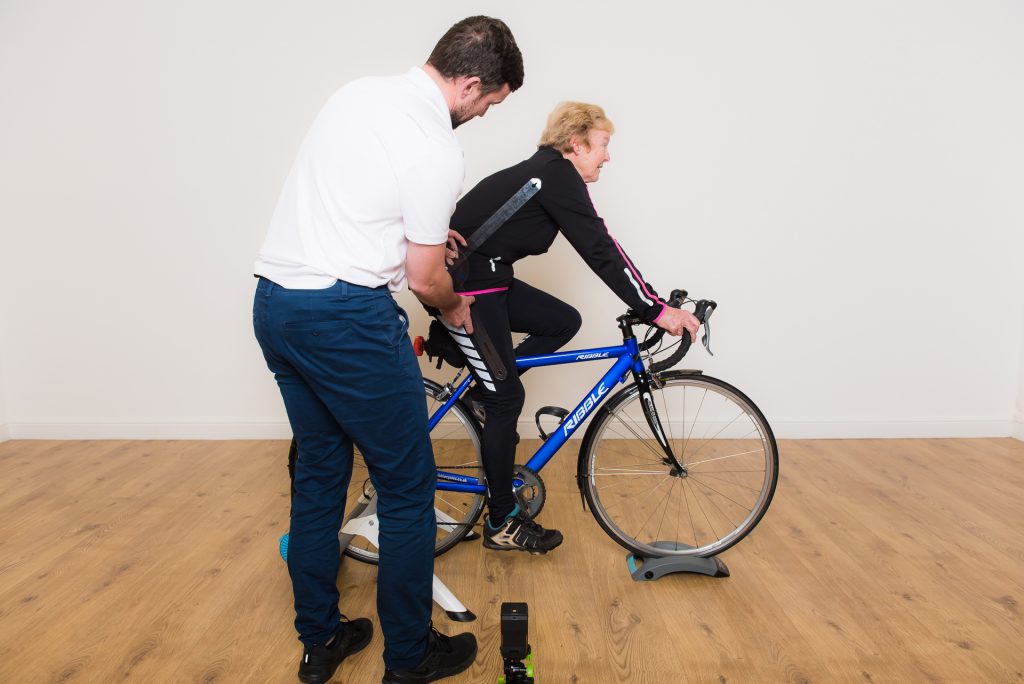
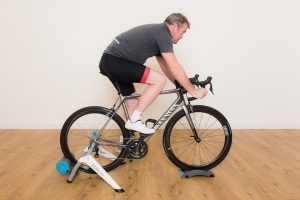
On-Bike Assessment
Once it’s time to get on the bike, I try to get them to pedal for a while and warm-up. Helps get over their nerves and start settling into their normal rhythm.
Initial Check
I was taught to quickly assess the rider overall and correct anything that is so wrong it will influence the fit and override adjustments made. In all honesty, I find this to be rare. Occasionally, someone has a crazy long stem or massive drop from saddle to bars. So it’s worth checking.
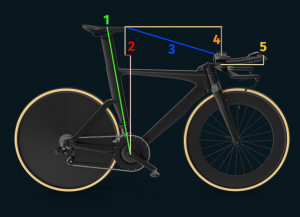
Adjustments
I go through a similar process of pelvis, hips, Feet, thoracic, shoulders, and hands.
Occasionally, as you work through, you have to go back a step, but generally, if you get the saddle height right, then the saddle fore/aft. You won’t have much trouble adjusting the feet and upper body.
Saddle
As I said, the pelvis is central to cycle function, so it’s pretty important to get the saddle right.
There are a few keys to be watching out for:
- The pelvis – tilt, rocking, rotation?
- The hips – Is ROM an issue?
- The Knees – Is there smooth motion through the bottom of the pedal stroke?
- The Ankle – Are they compensating for lack of ROM elsewhere by excessive use of the ankle?
- Cleat Position – doesn’t impede movement, do wedges and shims help?
These are just a few ideas of what to look for, but it’s a great start. Focus on one thing, make an adjustment and re-assess.
I’d say rider feedback is a pretty high priority. If an adjustment is feeling better, that’s half the battle. However, slight caution as they only have a very short time to feel the position, so you need to make sure you are happy with how it looks too.
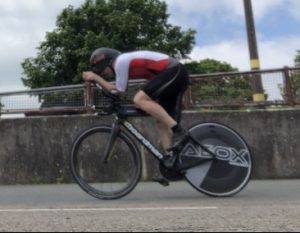
Aero-Fit
This should probably be a post on its own, but it’s worth adding a few notes here.
An aero fit is more tricky; it will depend a bit more on their flexibility as you are pushing closer to the limits.
If it’s a TT specialist, then do UCI rules come into play (which will change in 2023). Or are they free to experiment with a more forward saddle? Or higher hands?
The focus in a ‘fit’ session is about getting the fundamentals in place. Getting a solid position where power can be produced and the rider can maintain the position is the first priority.
Without aero testing, the actual aerodynamic efficiency can only be guessed at to a certain degree. There are things that you know are going to have a positive effect; however, until it’s tested, it’s still only an educated guess.

For more on Aero Testing, see:
What can we do for You?
With a coach, you are part of a team. Together we make a plan tailored to your goals and your lifestyle