Out and Back Aero-Testing:
How to Get Faster
One of the most popular posts I’ve ever written was on Aero-Testing. In that post, I described the process using an outdoor velodrome and doing analysis with Golden Cheetah’s Aero Lab. Since then I moved to Switzerland and don’t have access to such a great facility.
As a result, to get my Aero-Testing going I’ve had to learn a new method.
I was already using Aerotune for their Metabolic Testing and having heard them talking about it on the Endurance Innovation Podcast, it was a logical place to start.
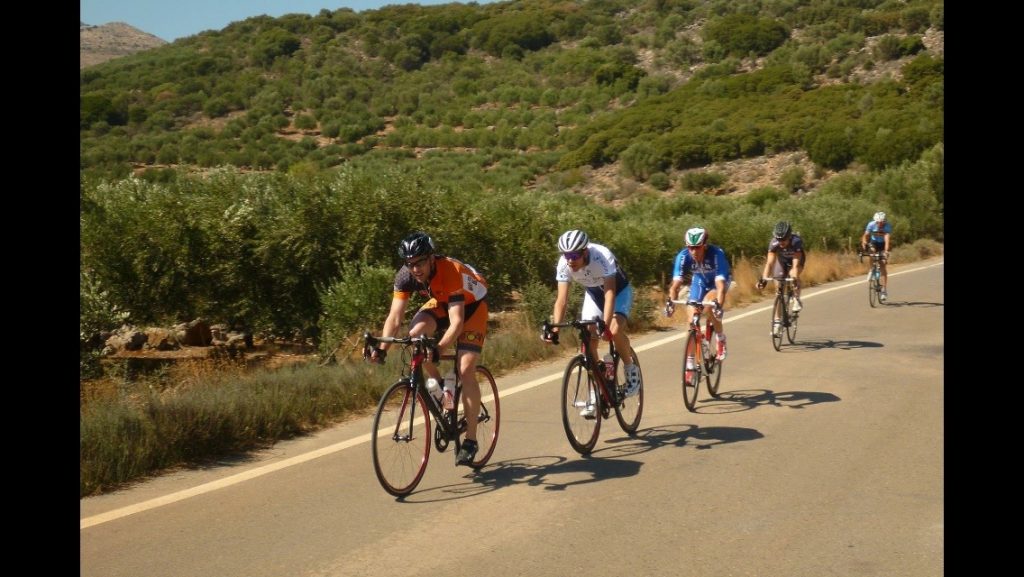
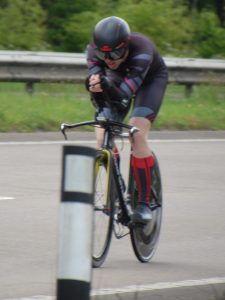
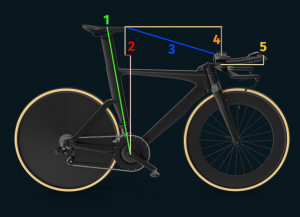
I’m not the most powerful rider, so I need all the aero gains I can get!! I estimate my CdA to be somewhere around 0.2, but have never been in a wind tunnel. My position (on the right) got me a 19:57 in a 10-mile time trial off about 320 Watts, so it’s not bad.
Equipment
The equipment you need to get started is:
- A Power Meter
- GPS Tracker
- Speed Sensor (not hub-based)
- A Suitable Test Route
- Know the combined weight of you and your bike
- Low wind conditions
This is the basics, but what you really need is a good, methodical process on top.
Before You Start
The biggest difficulty is finding a suitable testing track. You need a flat, straight 1km road that’s safe to ride on and has about 200m on either end to accelerate up to speed and get into position before the start of the testing run.
Aerotune have a database on their website, so you can see if there is an established one near you. There wasn’t one already in my area, so I had to find one. There’s plenty of information on their website about how to go about that and I was lucky enough to find a suitable road very close to my village.
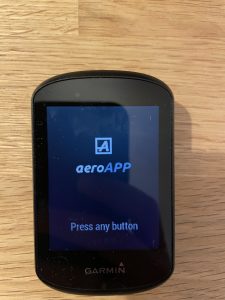
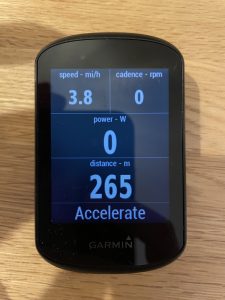
If you have a Garmin head unit, it does help a lot as Aerotune have a Garmin IQ app that makes life really easy when you are out doing the testing. If not, you just have to know the course start and stop points and be up to speed and in position as you hit them.
Once you’ve got your route and you are ready to go you need to do some baseline tests. This is just like I’ve described before. This is testing the position you have already and requires 2-3 runs up and down the 1km course to get stable data. One caution here, if it’s too windy or too much traffic you won’t get stable data, you need good weather.
Getting Your Baseline CdA
The app is brilliant, you just ride to the course and press start. The app tells you x meters to start and you accelerate up to speed, get in position and it counts you down to the start. Then during the test, it counts you down the 1000 meters to the finish. Once complete it tells you to roll out 200m, turn and counts you down to the start of the return leg. Again it counts you down all the way to the finish of the test and that’s one test run done.
If you have your phone on you it will send the data back and forth…)or some kind of magic happens!!) and your head unit will tell you if it was successful as a run. If it was ok, you go again. If the data is stable you have your baseline and are now able to move on to testing
Here’s to going FASTER in 2022 🙂
The Testing Process
Testing is time-consuming. Make sure you have suitable clothes for while you are making changes to your bike and make sure you have the equipment and tools you need.
Have a Plan
Make sure you know what you want to test. I’ve done absolutely loads of testing and I do find changes to your bars and front end position make the biggest difference, so I usually start there.
The testing is demanding, so you only have so much time and energy in one day. So prioritise your testing and be methodical.
Here are some ideas:
- Elbow pad width
- Elbow pad reach
- Elbow pad height
That sounds simple enough, but that could be a few sessions right there!! If you test baseline, 2 elbow pad width changes (that’s six runs already), then take the best position (s) and try a different reach (that’s 8-10 runs). You will be getting tired by that point.
On the plus side, you’ll gain some serious insight into your position if you do that…pad height will have to wait for the next session 🙂
One of the best things about this process is that you really concentrate on your position. All you think about is the subtle changes you make to your position and combined with finding the CdA you can make educated desicions on what to change next. Important to make sure you can see down the road and that you are comfortable. If either of those are compromised you won’t be able to hold your position and your CdA will suffer.
First Day Testing – The Results
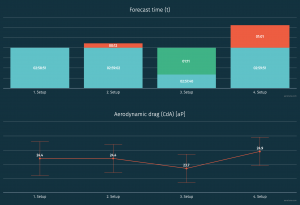
Here are the results. Aerotune uses a points system, which is basically CdA x 100…so a CdA of 0.25 would be 25 in aerotune…it is a little easier to work with.
Moving from left to right above, I tested:
- Baseline (ended up being 3 runs for stable data)
- Test 1 – Increased stem 4cm, from 8-12cm (2 runs)
- Test 2 – Lowered Saddle Height 5mm (2 runs)
- Test 3 – Decreased Extension Reach 2cm (2 runs)
As you can see my baseline was 24.4. which is pretty good. It is the position as above, but with training wheels, a bottle on the bike and winter clothes on! My clothes are fairly snug, so aren’t fast, but should be consistent.
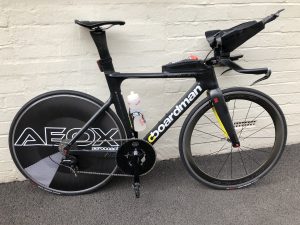
Test 1 was with the 12cm stem, I’m keen to test different stem lengths and on different days will swap out for 11cm, 10cm and 9 cm. With just this change the CdA was basically the same.
Test 2 – I’ve gradually lowered the saddle on my road bike over the winter and as a result, the TT saddle suddenly felt too high, so I lowered it 5mm…with surprisingly good results on the CdA. CdA is now down to 23.7, though a good change, the small change is within the margin of error, so more runs would be required to confirm the results.
Test 3 – I felt the reach was really long, so I left the 12cm stem on, but shortened the extensions 2cm. It wasn’t great…the position actually felt good, but I think it popped my head up, so the CdA went up to 24.9.
As you can see this is already 9 test runs, it’s quite tiring, as you need to be going fairly fast, I go about sweet spot intensity. It took me about 1 hout 10 minutes of riding and about an extra 30-40 minutes making changes (had trouble with gear cables with longer stem!).

Next Session
Can’t wait to get to test again…
Next time I get to test I will start with the position from today’s test 2 (12cm stem, saddle down 5mm).
I will then try gradually shorter stems. Once I settle on a stem I think gives me a good basis to start looking at changing the pad stack height.
Once